Are you struggling with headphones not working on Windows 11? You aren't alone. Audio connectivity issues are a common frustration after system updates or hardware changes. Fortunately, most of these problems are software-related and can be resolved quickly using the right troubleshooting steps. Whether you are using a wired jack or a USB headset, this guide will help you restore high-quality sound immediately.
From driver conflicts to incorrect security settings, various factors can silence your audio. Before assuming your hardware is broken, try these eight effective fixes to get your headphones back in working order. If you want to verify your output hardware first, you can use our free speaker test tool to check for sound signals.
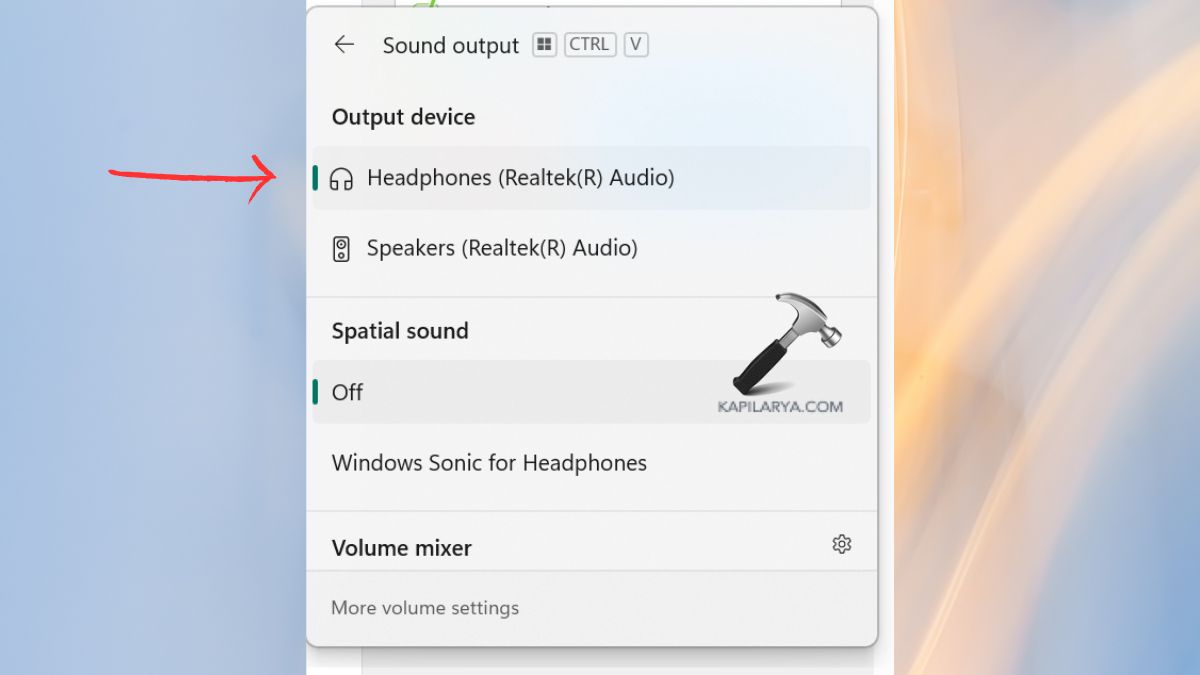
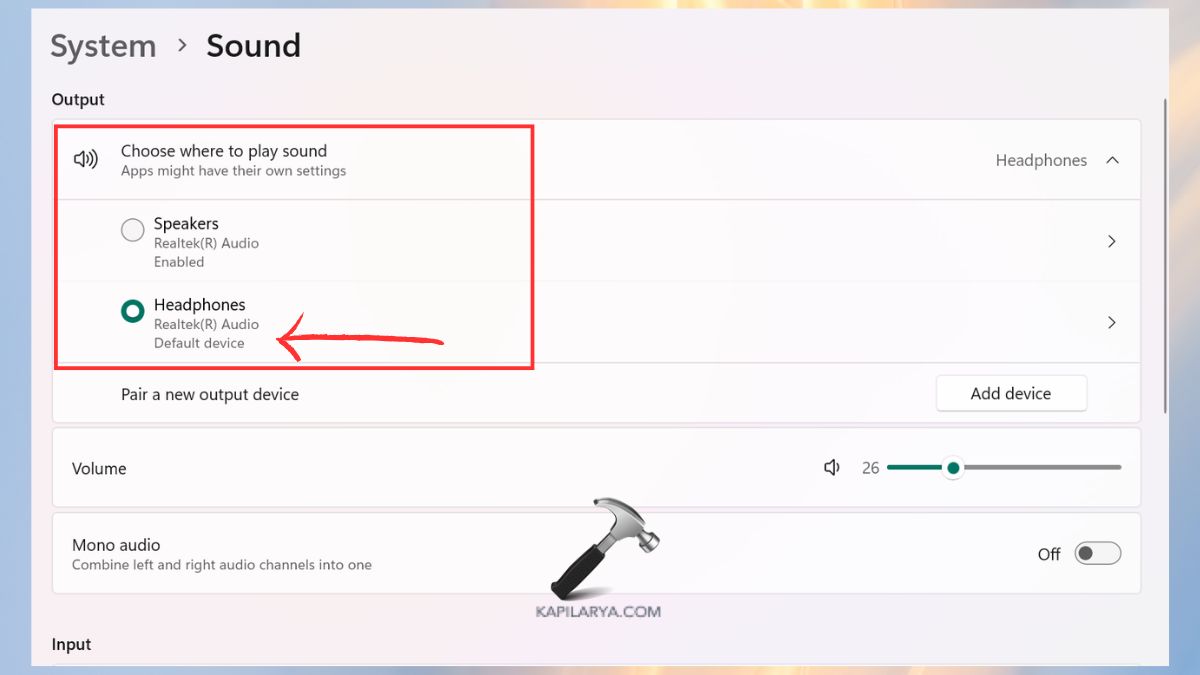
Fix 1: Verify Volume and Sound Output Settings
Often, the simplest explanation is the correct one. Windows may have defaulted to the wrong output device or muted the volume during a system event.
- Open Settings by pressing
Win + I, then navigate to System > Sound.
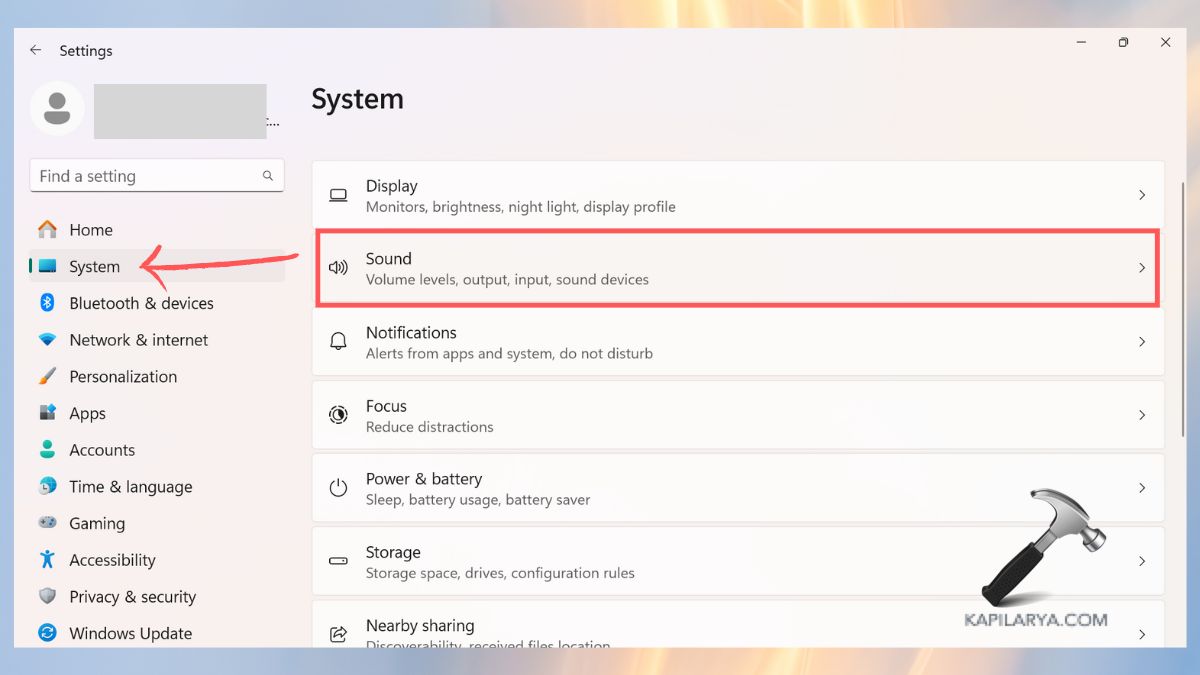
- Under the Output section, ensure your headphones are selected in the device list. Check the Volume slider to confirm it isn't set to zero or muted.
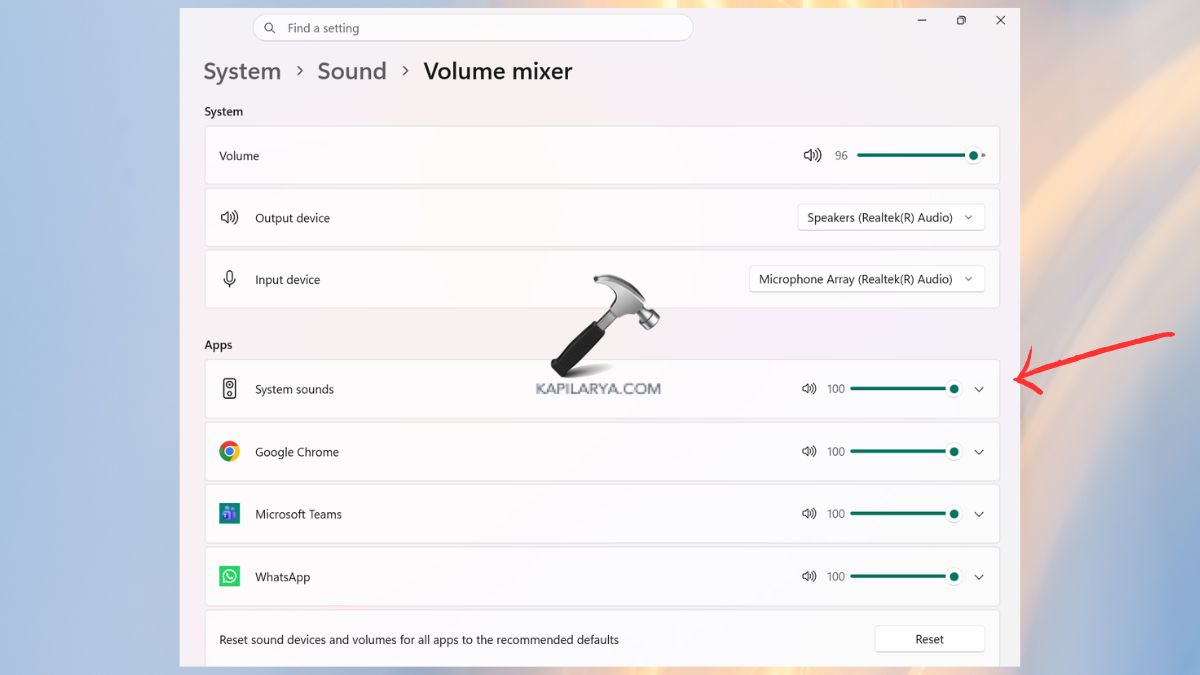
- Scroll down to Volume mixer and verify that specific applications aren't individually muted or set to a different output device.
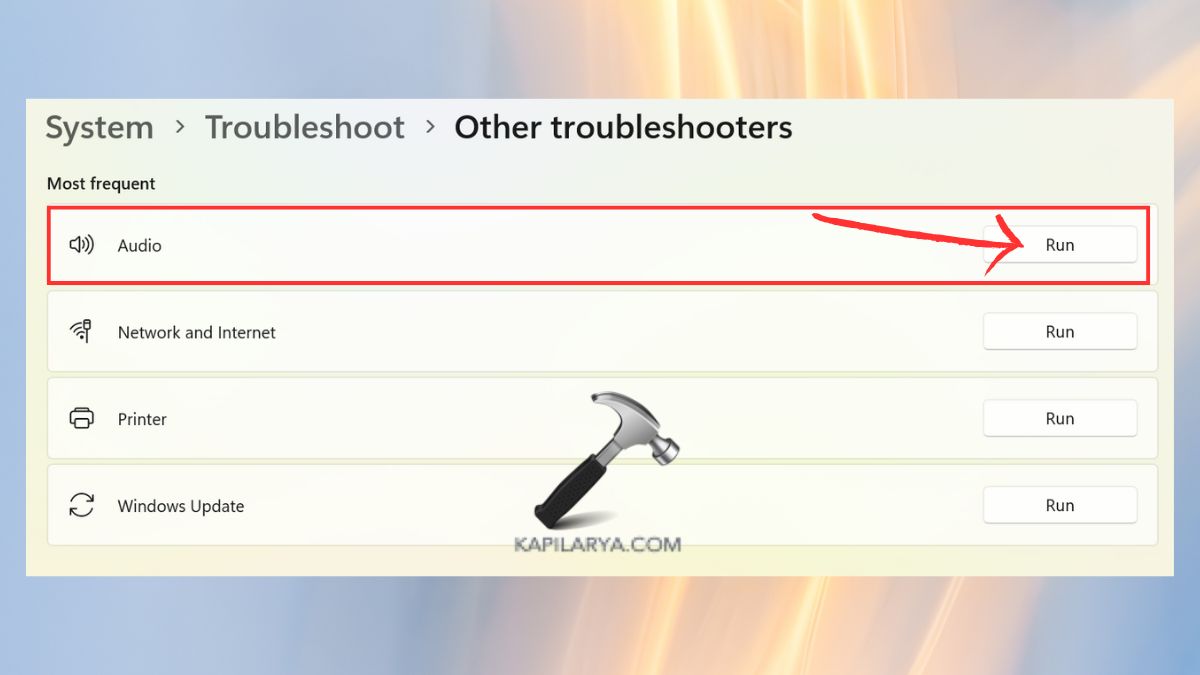
Fix 2: Utilize the Windows 11 Audio Troubleshooter
Windows 11 includes sophisticated built-in diagnostic tools designed to detect and repair common audio service failures automatically.
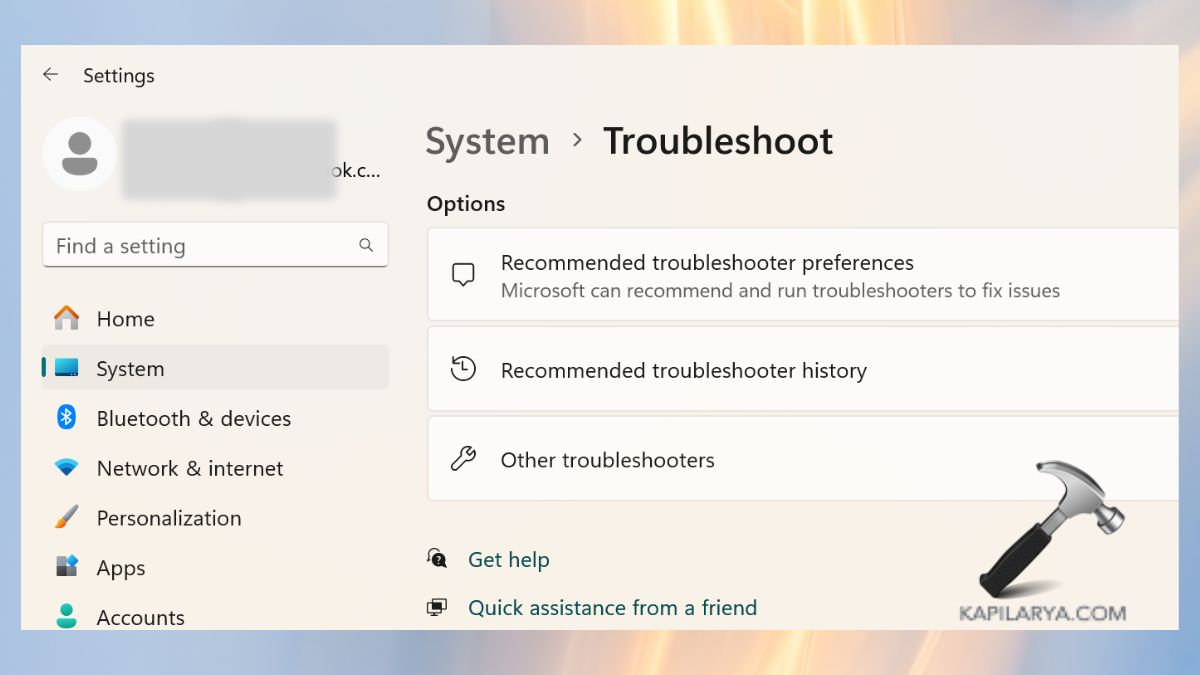
- Navigate to Settings > System > Troubleshoot.
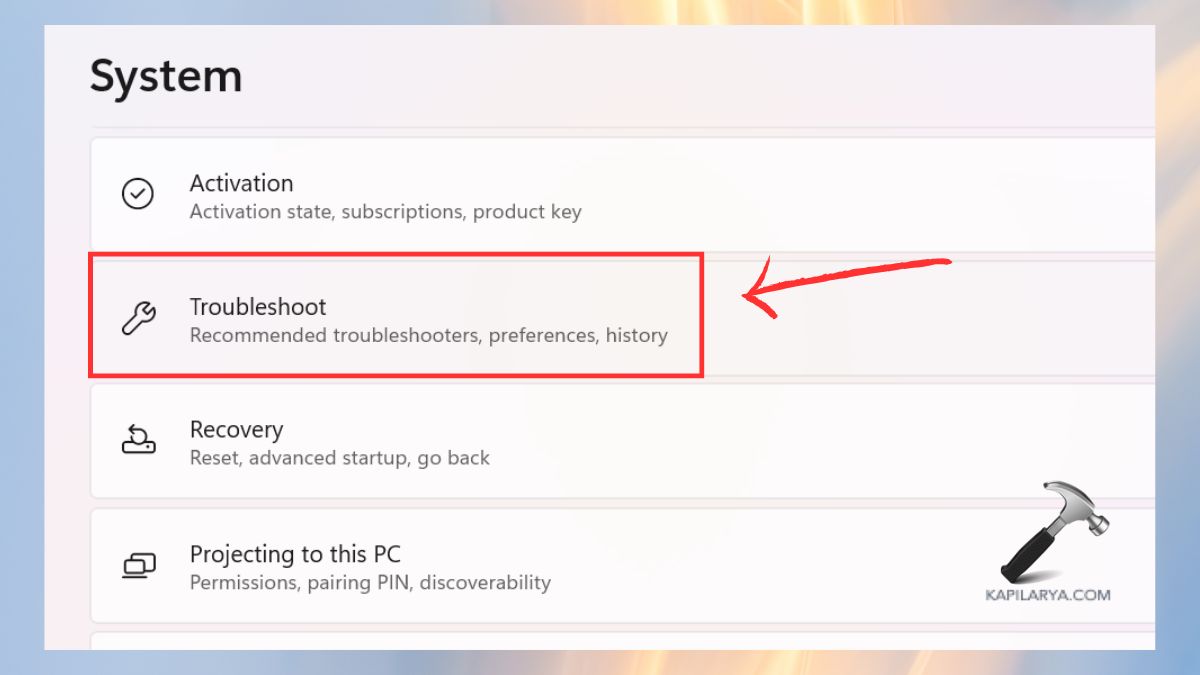
- Select Other troubleshooters.
- Find Audio and click the Run button. Follow the on-screen prompts to apply any recommended fixes.
Fix 3: Set Headphones as the Default Playback Device
If your computer is connected to multiple monitors or Bluetooth speakers, Windows might be routing audio to the wrong destination.
- Right-click the Sound icon on your taskbar and select Sound settings.
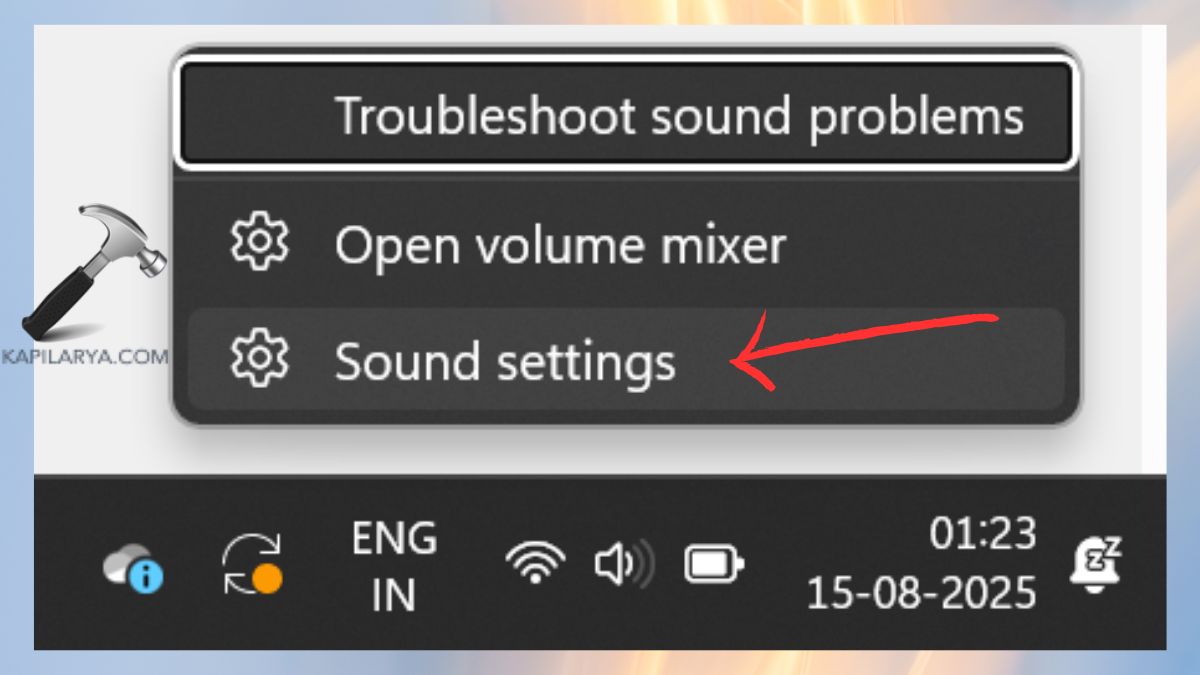
- Click More sound settings (at the bottom). In the Playback tab, right-click your headphones and select Set as Default Device. Click OK to save changes.
Fix 4: Inspect Physical Connections and Ports
Hardware issues are sometimes purely mechanical. Ensure your connection is secure by performing these checks:
- Ensure the 3.5mm jack is fully seated in the port; a loose connection can cause mono sound or total silence.
- For USB headsets, try unplugging and re-inserting the device.
- Inspect ports for dust or debris and clean them carefully with compressed air.
- Switch to a different port, preferably a USB 3.0 port on the rear of the PC if you are using a desktop.
- Remove unnecessary USB peripherals that might be causing power distribution conflicts.
Fix 5: Test Your Hardware on Another Device
To isolate whether the problem lies with Windows 11 or the headphones themselves, test the hardware externally. Connect your headphones to a smartphone, tablet, or another laptop. If they work there, the issue is definitely software-related on your PC. If they don't work anywhere, your headphones likely need replacement. While you're at it, you can also check your other peripherals like your mouse or keyboard to ensure your ports are functioning correctly.
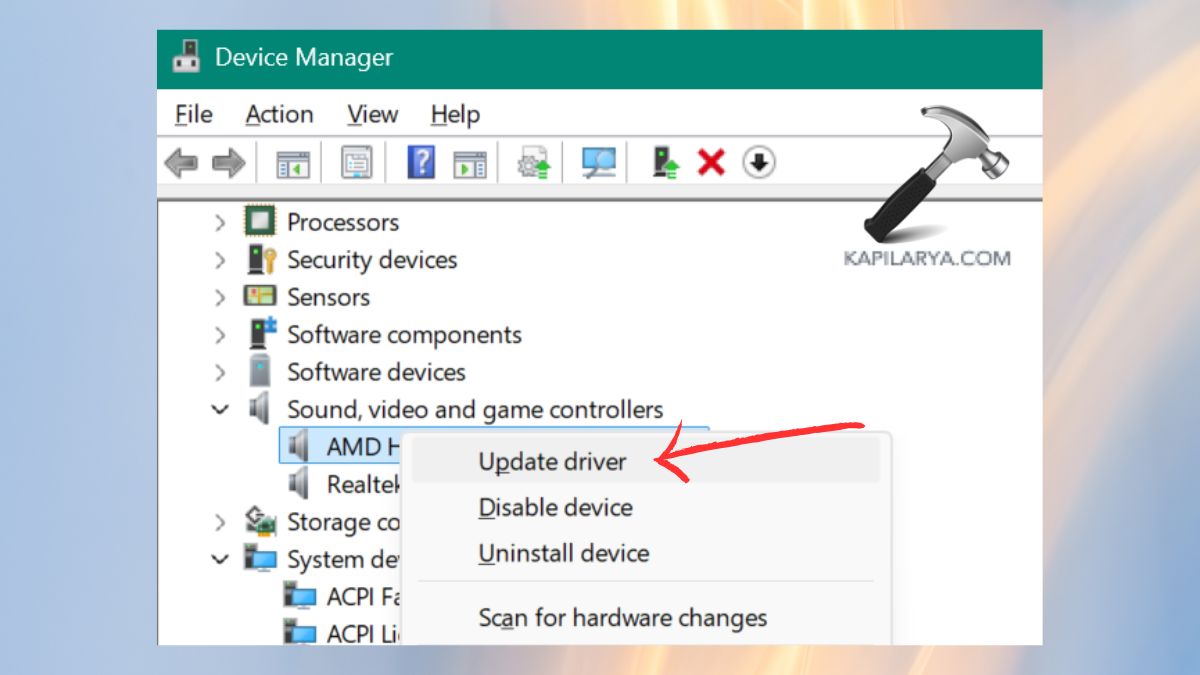
Fix 6: Manage Audio Drivers in Device Manager
Outdated or corrupted drivers are the primary cause of audio failures in Windows 11. Updating or reverting to a previous driver version can often resolve compatibility issues.
- Right-click the Start button or press
Win + Xand select Device Manager.
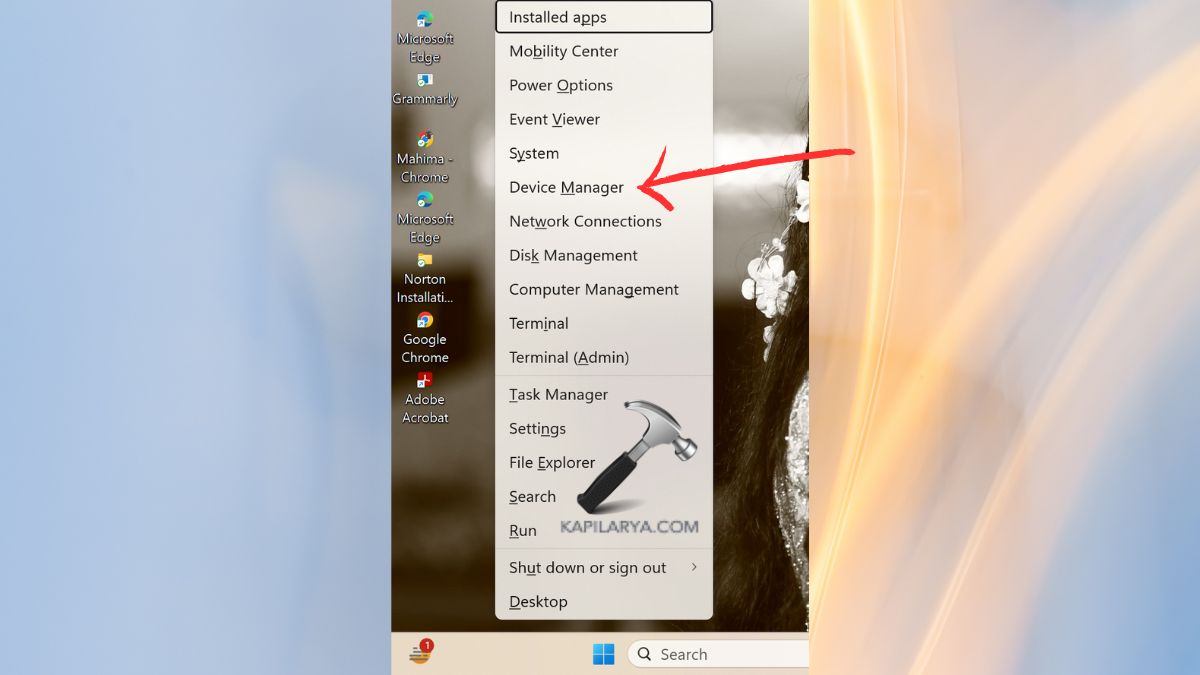
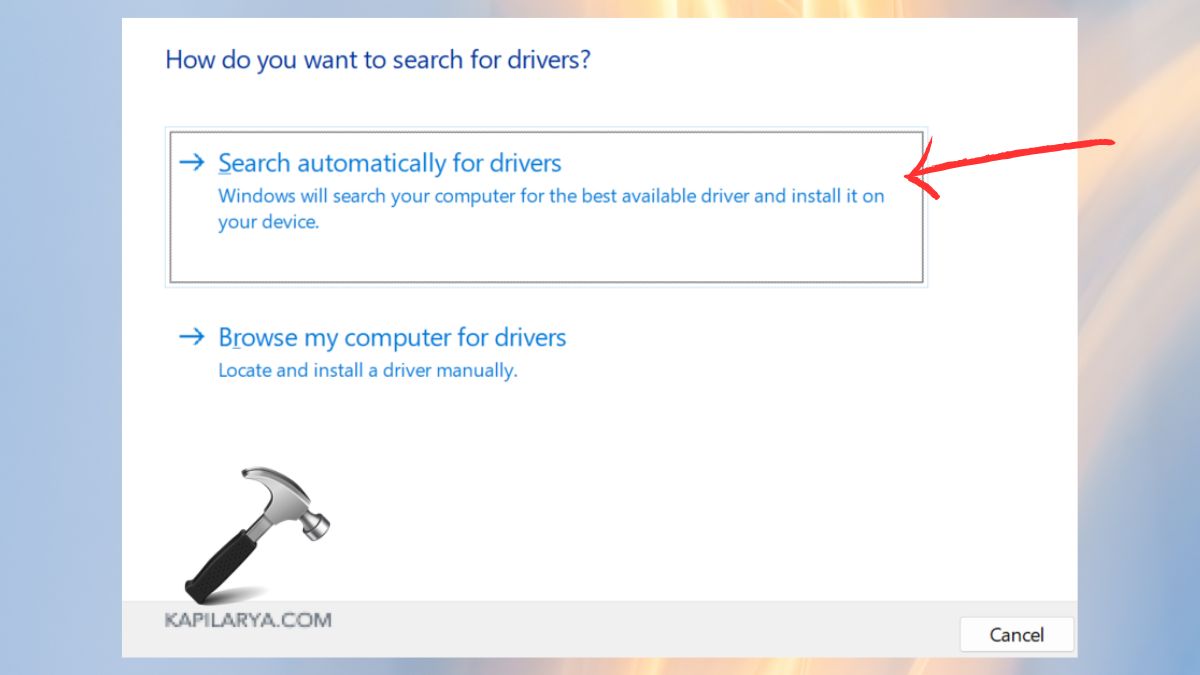
- Expand Sound, video and game controllers. Right-click your audio device and select Update driver.
- Choose Search automatically for drivers to let Windows find the best available software.
- If the issue started after a recent update, right-click the device, select Properties, go to the Driver tab, and click Roll Back Driver if the option is available.

Fix 7: Check for Windows Updates
Microsoft frequently releases patches that address known hardware compatibility bugs and stability issues in Windows 11.
- Go to Settings > Windows Update and click Check for updates.
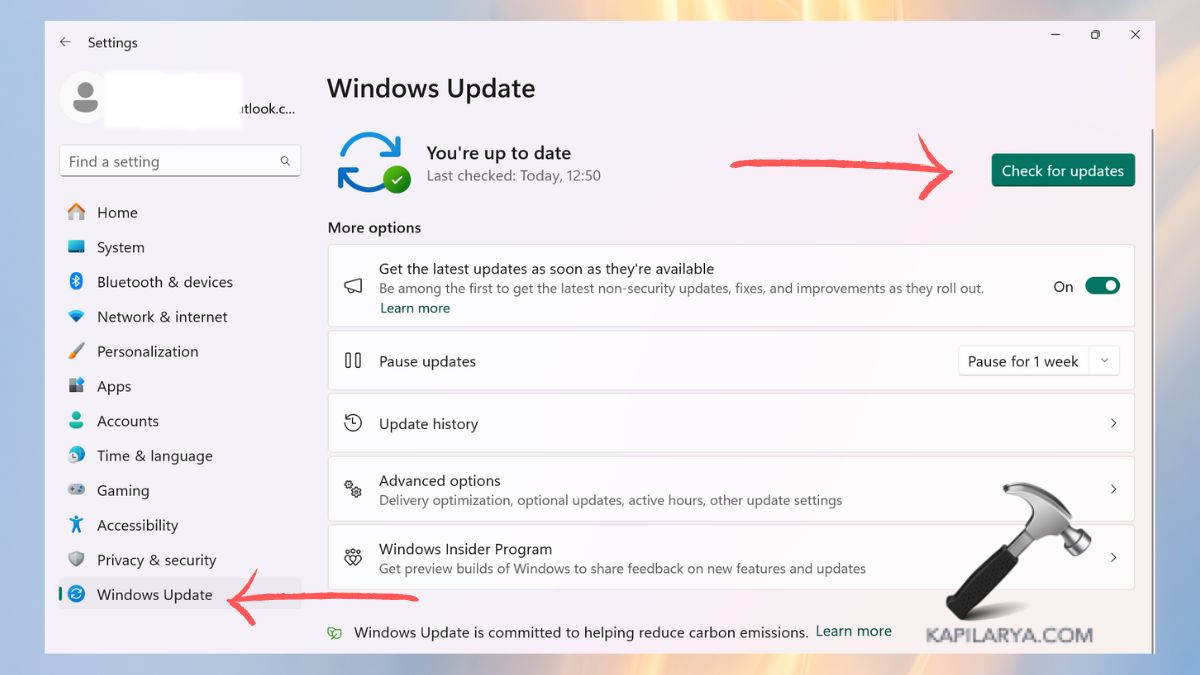
- Download and install all pending updates, then restart your computer to apply the changes.
Fix 8: Eliminate Signal Interference
Other devices can occasionally interfere with your audio signal or hijack the output channel. Try the following:
- Unplug external microphones or audio adapters that aren't in use. You can test your primary mic later at microphone-test.
- Disable Bluetooth temporarily to ensure a wireless speaker isn't overriding your wired headphones.
- If you are using a screen recording software, ensure it isn't capturing the audio stream exclusively. You can verify your display settings at screen-test.
Related Articles
Frequently Asked Questions (FAQs)
Why is my Windows 11 PC not detecting my headphones?
This typically occurs due to outdated audio drivers, a disabled playback device in settings, or a physical port issue. Following the driver update steps in this guide usually resolves the detection problem.
Windows 11 shows my headphones are connected, but there's no sound. Why?
This is often caused by the volume being muted in the Volume Mixer or the headphones not being set as the Default Device. Check your sound output settings to ensure the correct device is active.
How do I fix a non-responsive headphone jack?
Ensure the jack is clean, try a different port, and reinstall your audio drivers via Device Manager. If the port is physically damaged, you may need to use a USB-to-3.5mm adapter.
Do I need to perform a clean install of Windows to fix this?
Rarely. Most headphone issues are resolved through driver management, settings adjustments, or the built-in troubleshooter without needing to reinstall the entire operating system.