Few things are more frustrating than joining an important video call only to find your laptop camera showing a black screen. Whether you are using a built-in webcam or an external device, this issue is common on Windows 10 and Windows 11 systems. Before diving into complex repairs, you can quickly verify your hardware status using our online camera test tool to see if the issue is software-specific.
A black screen can stem from various sources, including outdated drivers, privacy settings, or even hardware malfunctions. Common symptoms reported by users include:
- Brand-Specific Issues: Logitech or A4Tech webcams frequently encounter black screens during Zoom or Teams meetings.
- Audio-Visual Mismatch: The webcam may display black while the microphone test shows that your audio is working perfectly.
- Color Distortions: Instead of black, you might see a solid white, green, or gray screen.
- Orientation Problems: The image appears mirrored, inverted, or completely upside down.
- Detection Failures: The system fails to recognize the camera entirely, often requiring a check of physical connections or a troubleshooting deep dive.
Step-by-Step Solutions to Fix Your Webcam
1. Download Official Manufacturer Drivers
The most reliable way to ensure hardware compatibility is to download drivers directly from the manufacturer (e.g., HP, Dell, Lenovo, or ASUS). Generic Windows drivers sometimes fail to unlock the full functionality of specialized webcams.
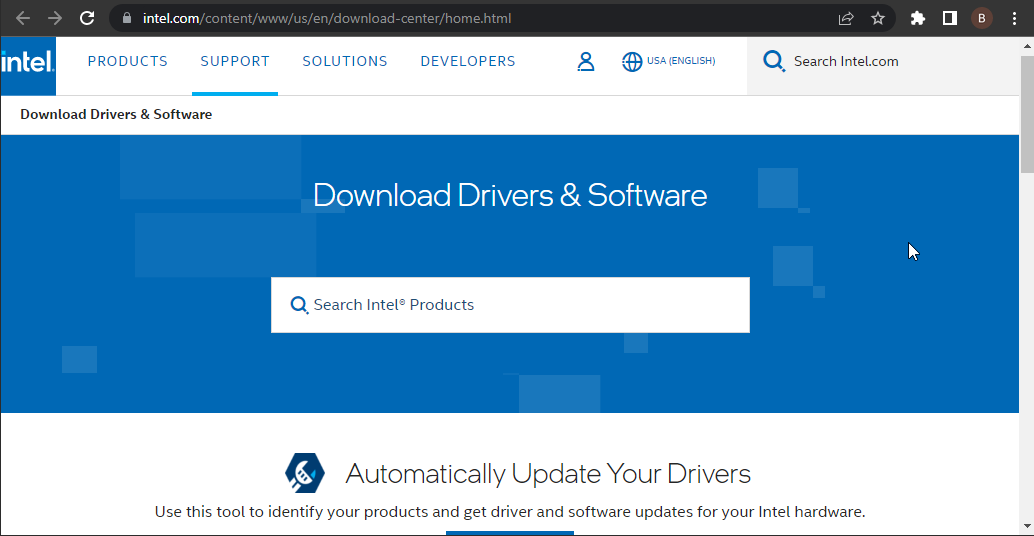
If your laptop camera is black, visit the support page for your specific model, locate the "Drivers and Downloads" section, and install the latest "Camera" or "Imaging Device" package. If you have recently upgraded your OS, ensure you select the version compatible with Windows 10 or 11.
2. Manually Update Drivers via Device Manager
If you prefer using Windows built-in tools, the Device Manager is your first stop for resolving driver conflicts.
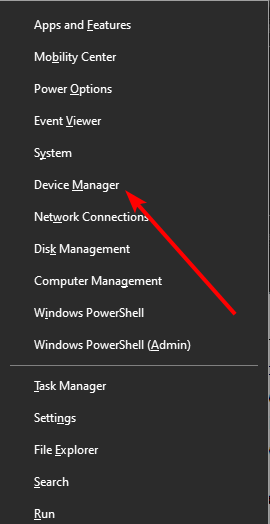
First, right-click the Start button (or press Windows Key + X) and select Device Manager.
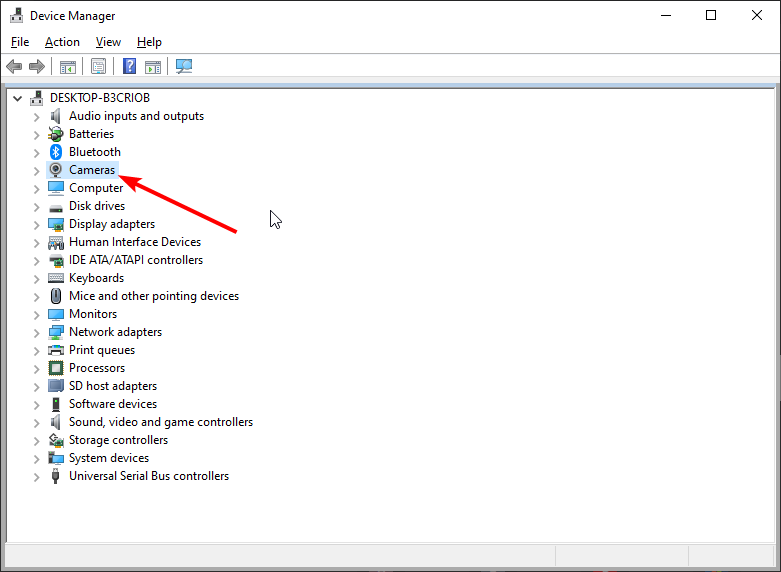
Locate the Cameras or Imaging devices section and click the arrow to expand it.
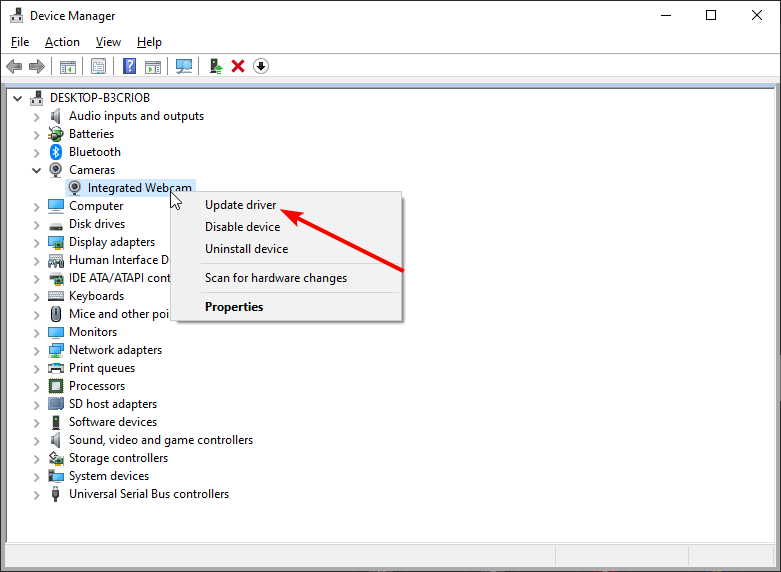
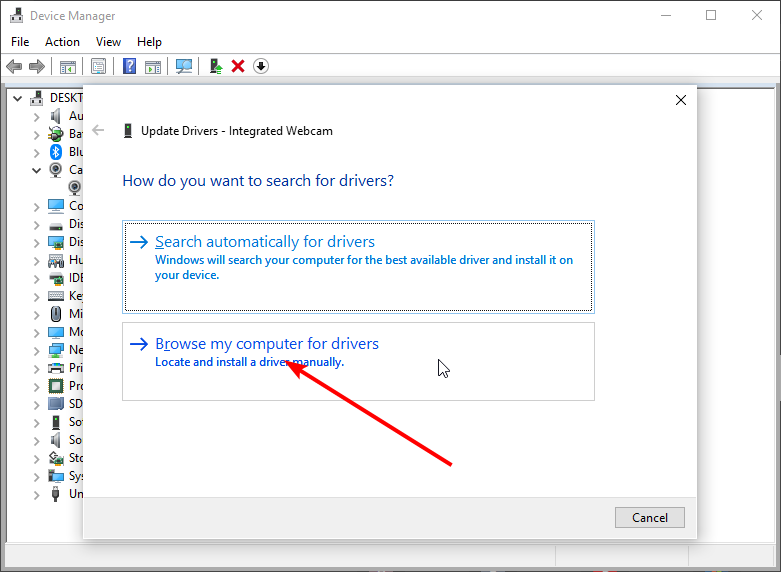
Right-click on your webcam and choose Update driver.
Select Browse my computer for drivers to manually point the system toward a generic fix if the automatic search fails.
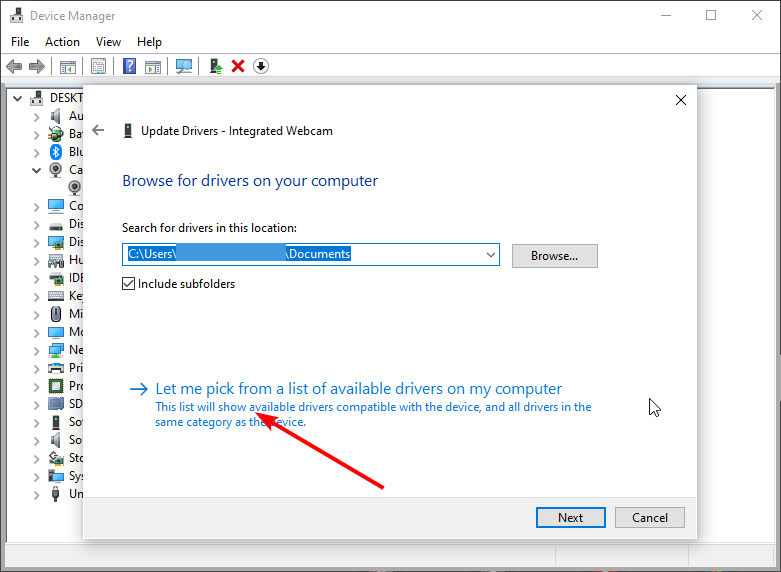
Choose Let me pick from a list of available drivers on my computer.
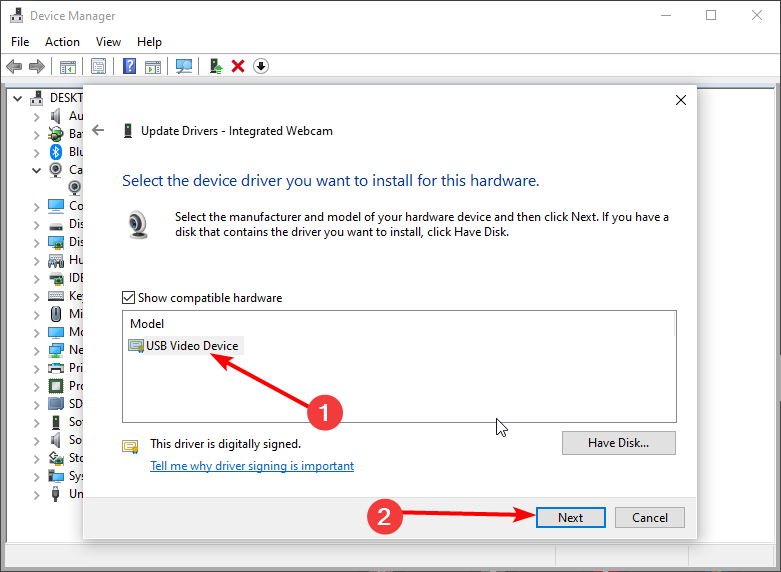
Select USB Video Device from the list. This is a generic driver that often bypasses proprietary bugs. Click Next and restart your computer once the process completes.
3. Reinstall Your Video Conferencing Apps
If your camera works on our test page but stays black in Zoom or Skype, the application itself might be the culprit. Updates to these apps can sometimes break existing configurations.
Open Settings (Windows Key + I) and go to Apps.
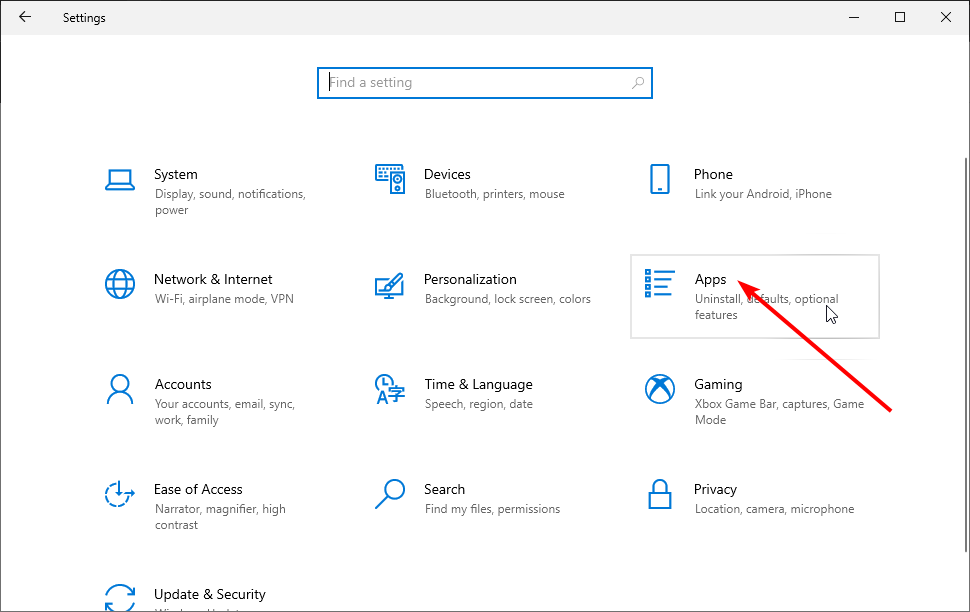
Find the problematic app (like Skype or Zoom), click on it, and select Uninstall.

After removal, visit the Microsoft Store or the official app website to download and install the freshest version. This ensures all registry keys and permissions are reset.
4. Force a Driver Refresh
Sometimes a driver becomes stuck or corrupted. Uninstalling the device and letting Windows rediscover it can clear these glitches.
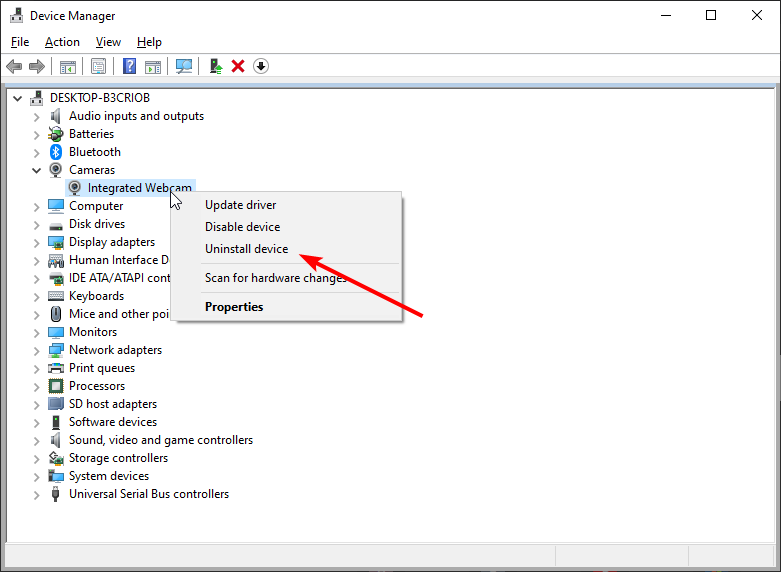
Return to Device Manager and expand the Cameras section.
Right-click your webcam and select Uninstall device.
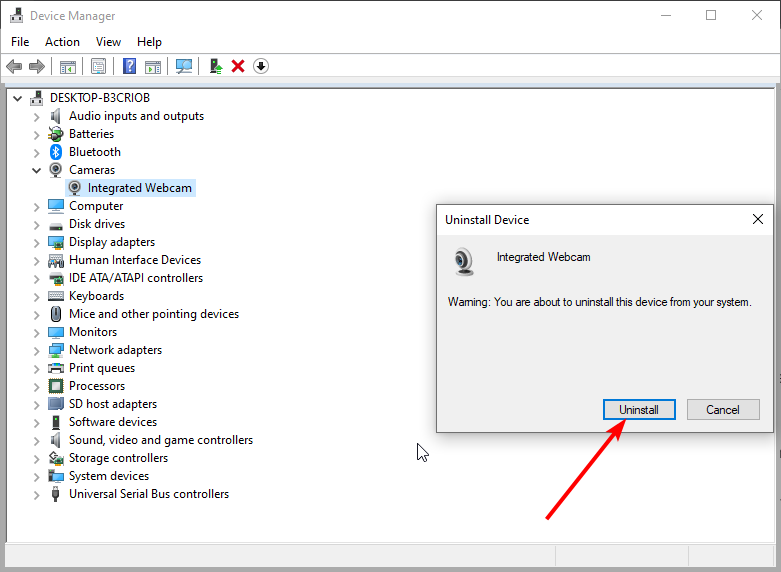
Confirm the uninstallation. If prompted, do not delete the driver software unless you have a backup downloaded.
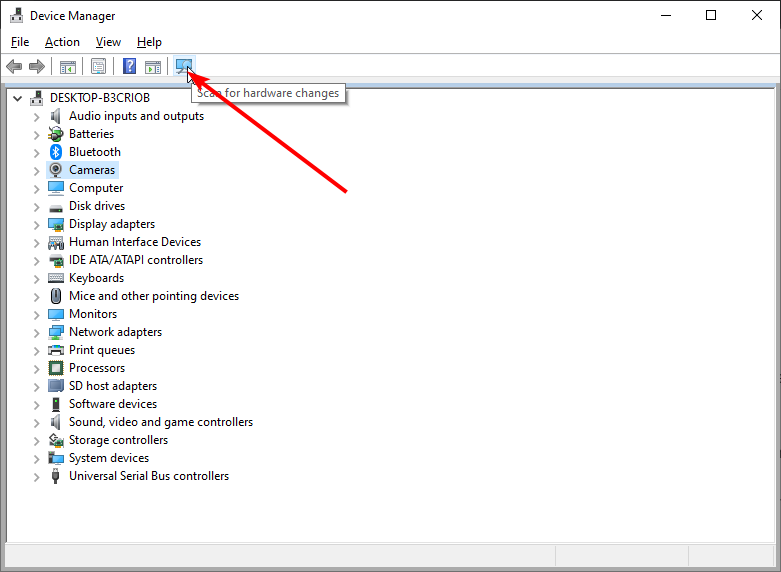
Finally, click the Scan for hardware changes icon at the top of the window. Windows will automatically detect the new hardware and reinstall the necessary files.
5. Use External Lighting to Wake the Sensor
In low-light environments, some webcam sensors fail to initialize, resulting in a black screen. A simple trick is to point a bright flashlight or phone light directly at the camera lens for a few seconds. This can trigger the auto-exposure sensor to recalibrate and begin displaying an image.
6. Perform a Power Reset (Laptop Users)
Residual static electricity can interfere with internal components like the built-in webcam. To fix this, shut down your laptop, disconnect the charger, and remove the battery (if it is removable). Press and hold the Power Button for 30 seconds. This drains all remaining power. Reinsert the battery, plug it in, and restart.
7. Adjust Exposure in App Settings
If your camera is working but the image is too dark to see, your exposure settings might be set to the minimum. For apps like Skype, go to Tools > Options.
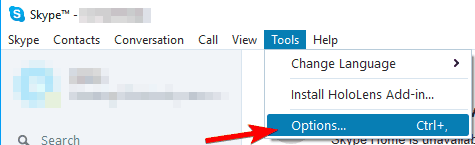
Navigate to Video settings and select Webcam settings.
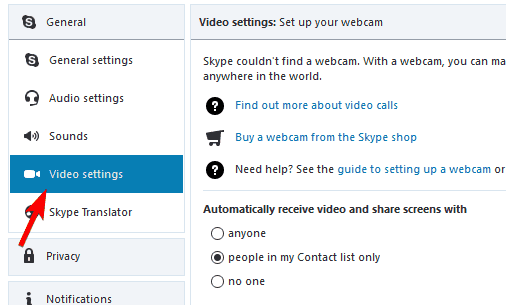
Under the Camera Control tab, ensure the Auto checkbox next to Exposure is ticked. This allows the camera to adapt to your rooms lighting automatically.
8. Verify Hardware Compatibility
If you are using an older USB webcam on a brand-new Windows 11 machine, it might lack UVC (USB Video Class) compatibility. Check the manufacturer documentation to see if the device supports modern operating systems. If your screen test shows no flickering but the camera stays black, it may simply be time for a hardware upgrade.
9. Manage USB Port Interference
USB ports share bandwidth. If you have multiple high-data devices plugged in (like external hard drives or keyboards), your camera might not receive enough power or data priority. Try unplugging other devices or using our mouse test and keyboard test to ensure your ports are functioning correctly.
Advanced: Fixing the Camera App in Windows 11
If the native Windows Camera app is failing, you can reset it via the Terminal. Right-click the Start button and select Terminal (Admin). Paste the following command and hit Enter:
get-appxpackage *Microsoft.WindowsCamera* | remove-appxpackageOnce finished, reinstall the Windows Camera app from the Microsoft Store to restore default settings.
Frequently Asked Questions
How do I restart my laptop camera?
The quickest way to restart a webcam is to restart your computer. If the problem persists, you should toggle the camera status in the Device Manager by disabling and then enabling the device, or simply uninstalling the driver as described in step 4.
Is there a privacy shutter covering my lens?
Many modern laptops from Lenovo, HP, and Dell include a physical slider to cover the webcam for privacy. Check the top bezel of your laptop for a tiny plastic slider. If you see a red or orange dot, the shutter is closed, which will cause a black screen even if the hardware is working perfectly.
Why does my webcam show a black screen only in certain apps?
This typically means the app does not have camera permission. Go to Settings > Privacy & Security > Camera and ensure the app is listed and allowed. You can also test the camera independently using our camera test tool.
Can a VPN cause webcam black screen?
A VPN itself should not affect local hardware. However, some VPN software includes webcam protection features that can block camera access. Check your VPN settings if you suspect this.
Related Articles
For more help with your peripherals, check out our guides on speaker testing or visit our troubleshooting hub.